Employee onboarding in Hamara HR is a simple process that can be performed only through the Customer Admin Portal.
Employees can be onboarded using either of the following two methods:
Add Employee: Add employees individually by entering their details.
Bulk Upload: Onboard multiple employees at once by uploading the employee details using the bulk upload option.
Navigation Path:
Organization → Employees → Add Employee / Bulk Upload
Either method can be selected based on the number of employees to be onboarded.
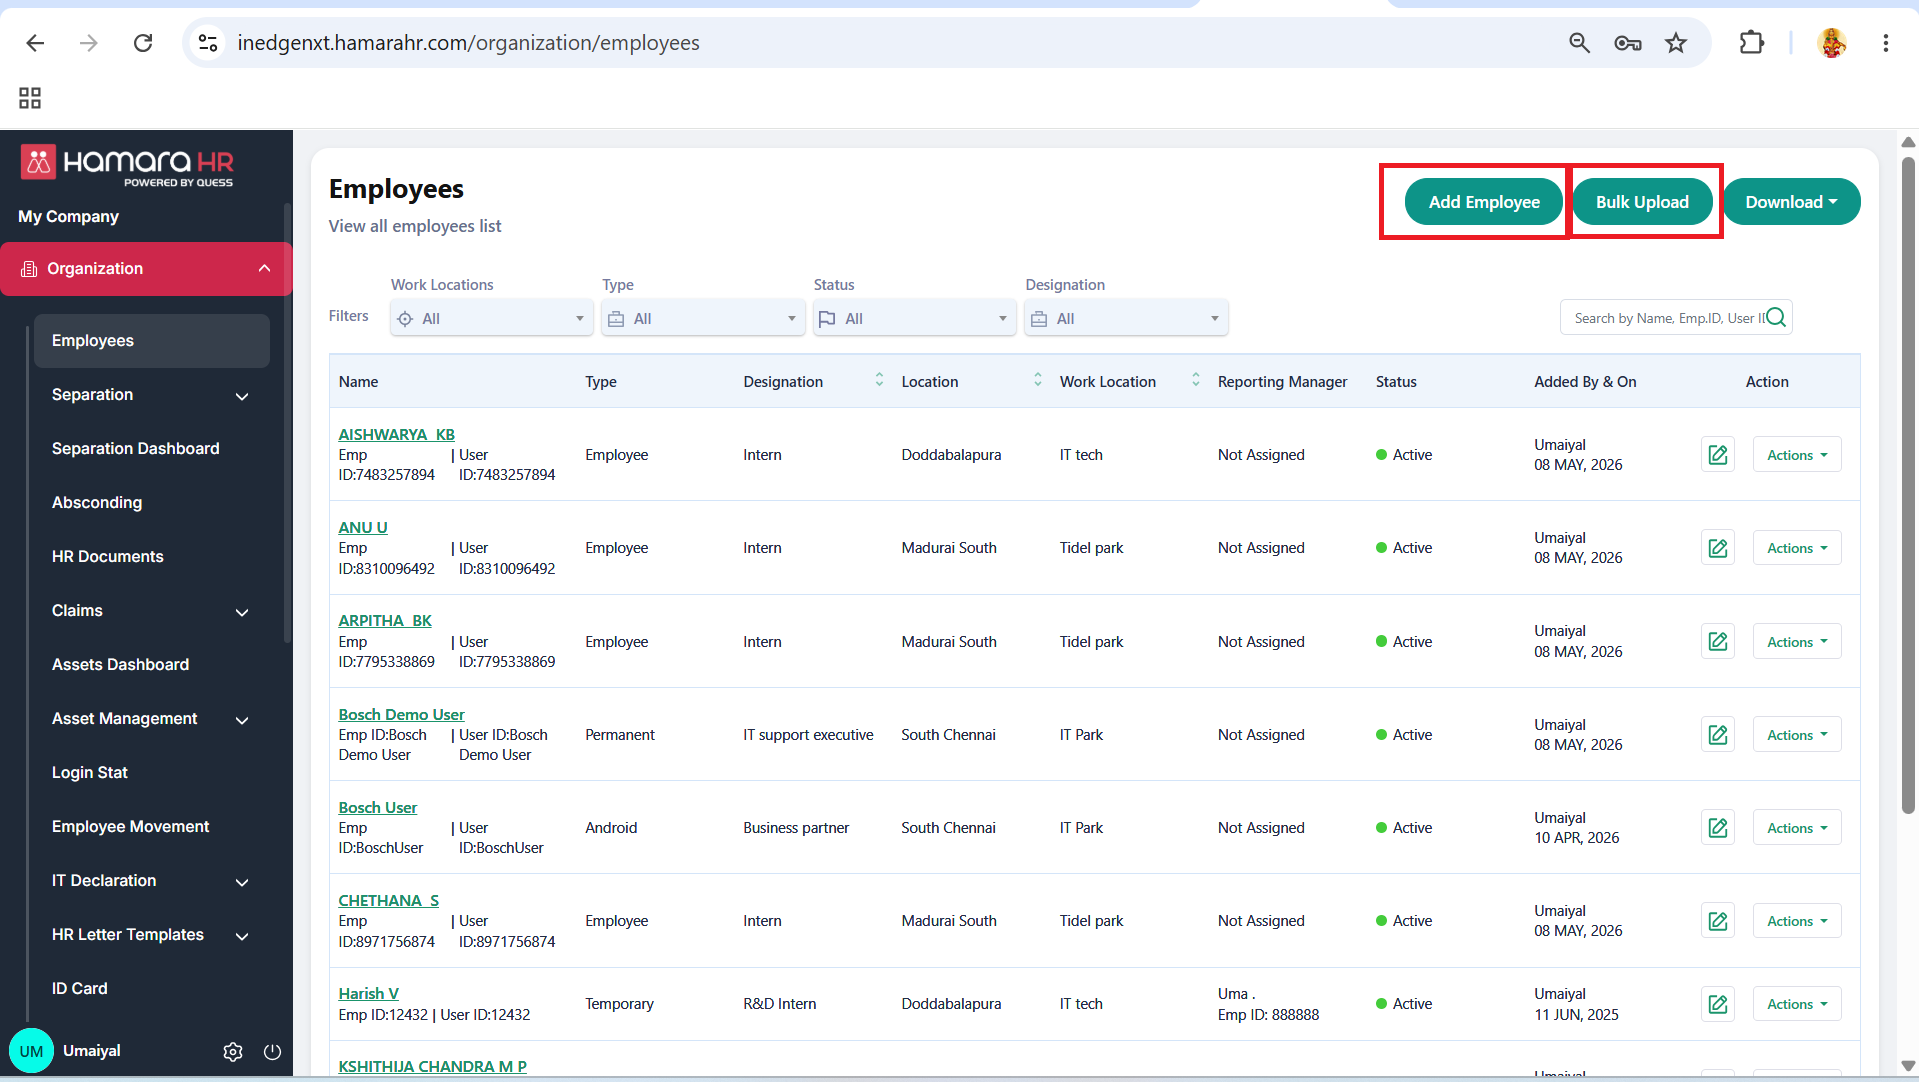
Step 1: Employee creation using Bulk upload
Navigation Path:
Organization → Employees → Bulk Upload → New Employee Onboarding
Select New Employee Onboarding.
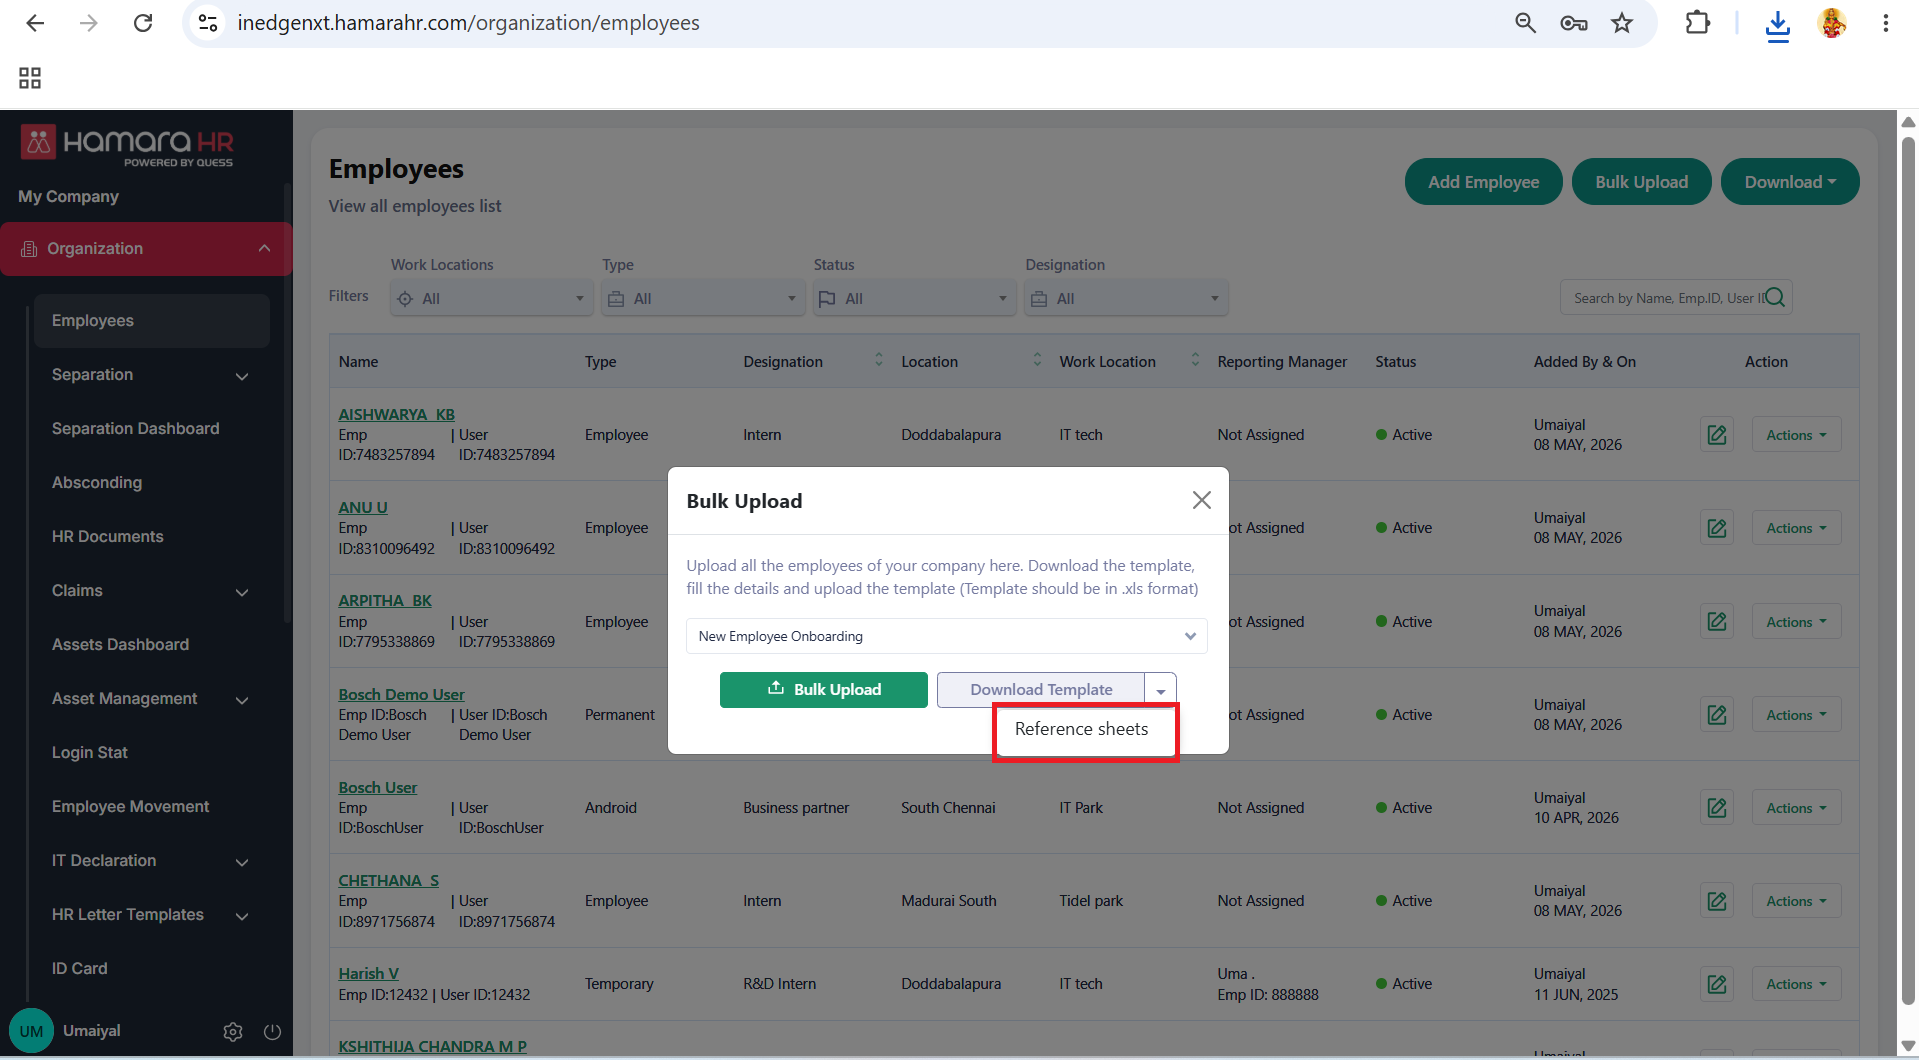
Download the bulk upload template.
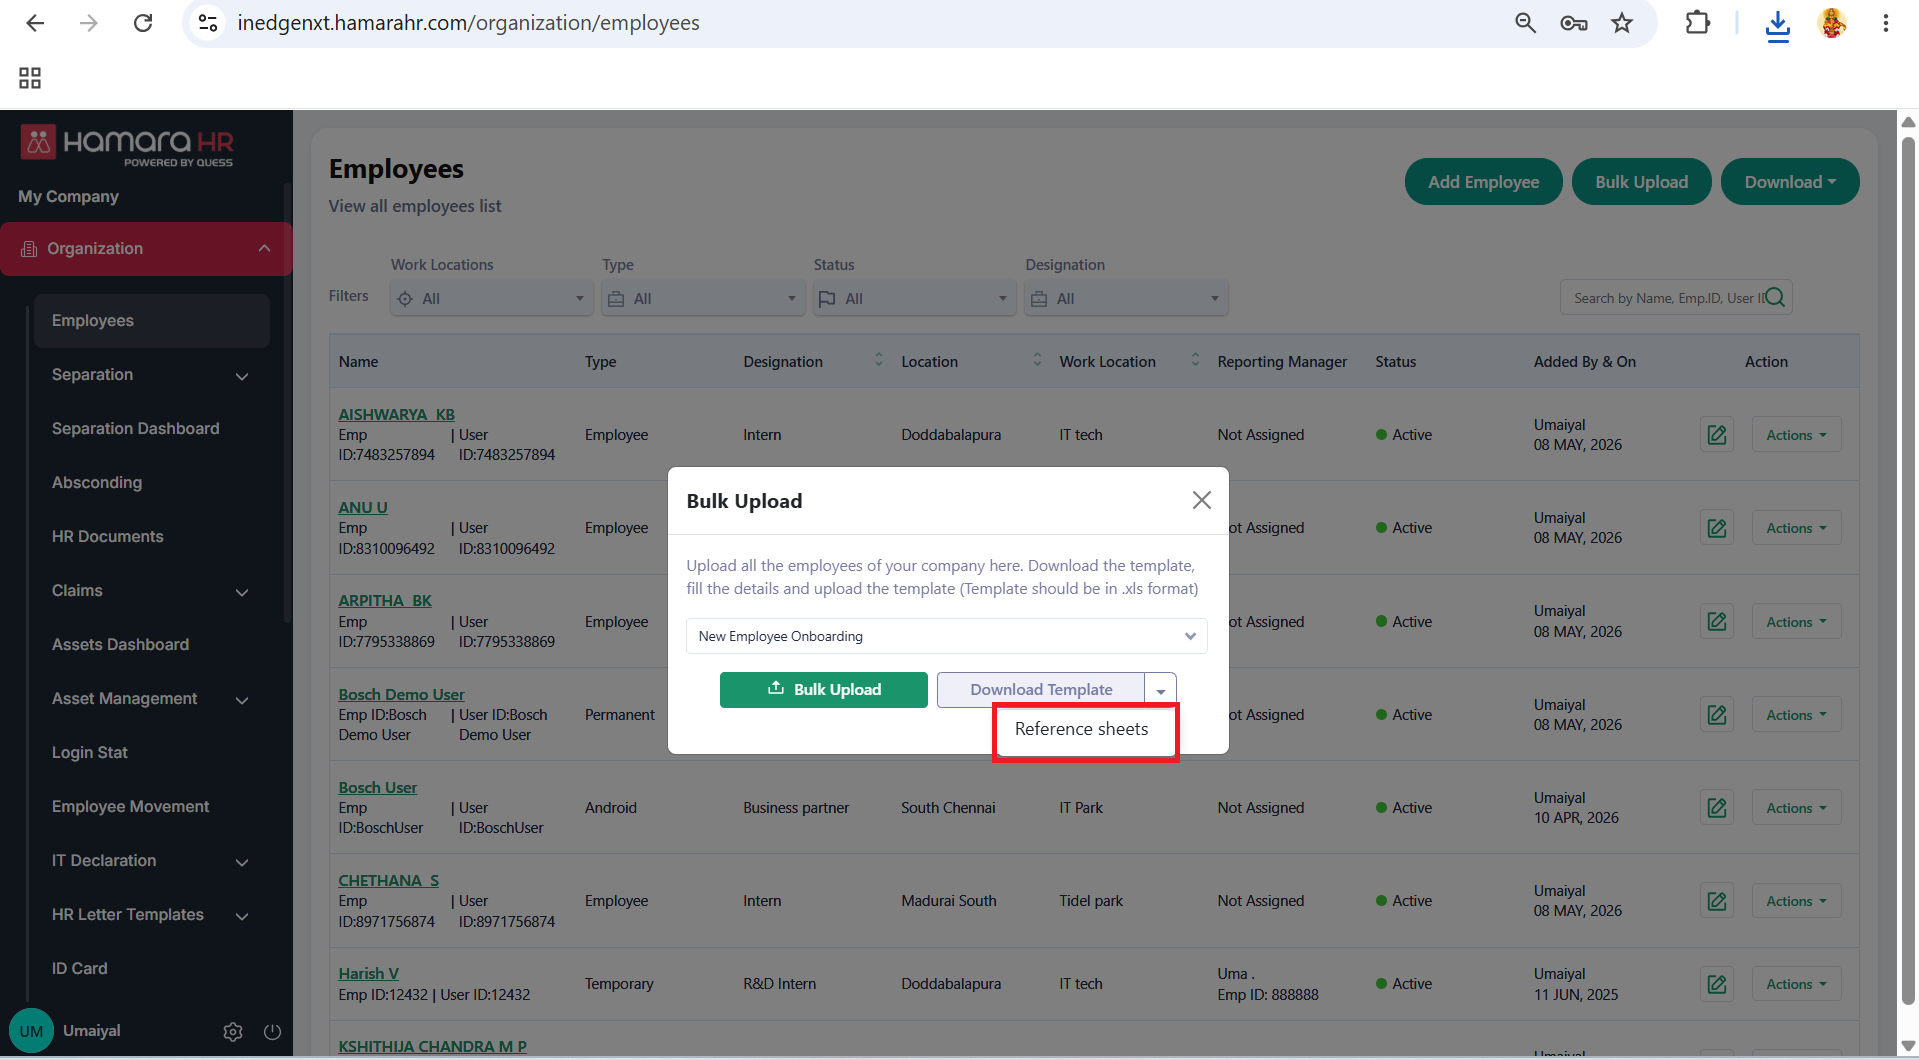
Download the Reference Sheet, which contains the master data to fill the employee details.
Navigation Path to Download the Reference Sheet:
Organization → Employees → Bulk Upload → Select Upload Type → Dropdown next to Download Template → Reference Sheet
Fill in all the required fields in the template using the Reference Sheet as a reference.
Verify the entered details and ensure they match the master data configured in Hamara HR.
Upload the completed template to onboard the employees.
Note: Please refer to the third template screenshot for guidance on filling in the required fields. Ensure that all mandatory fields are completed correctly before uploading the file.
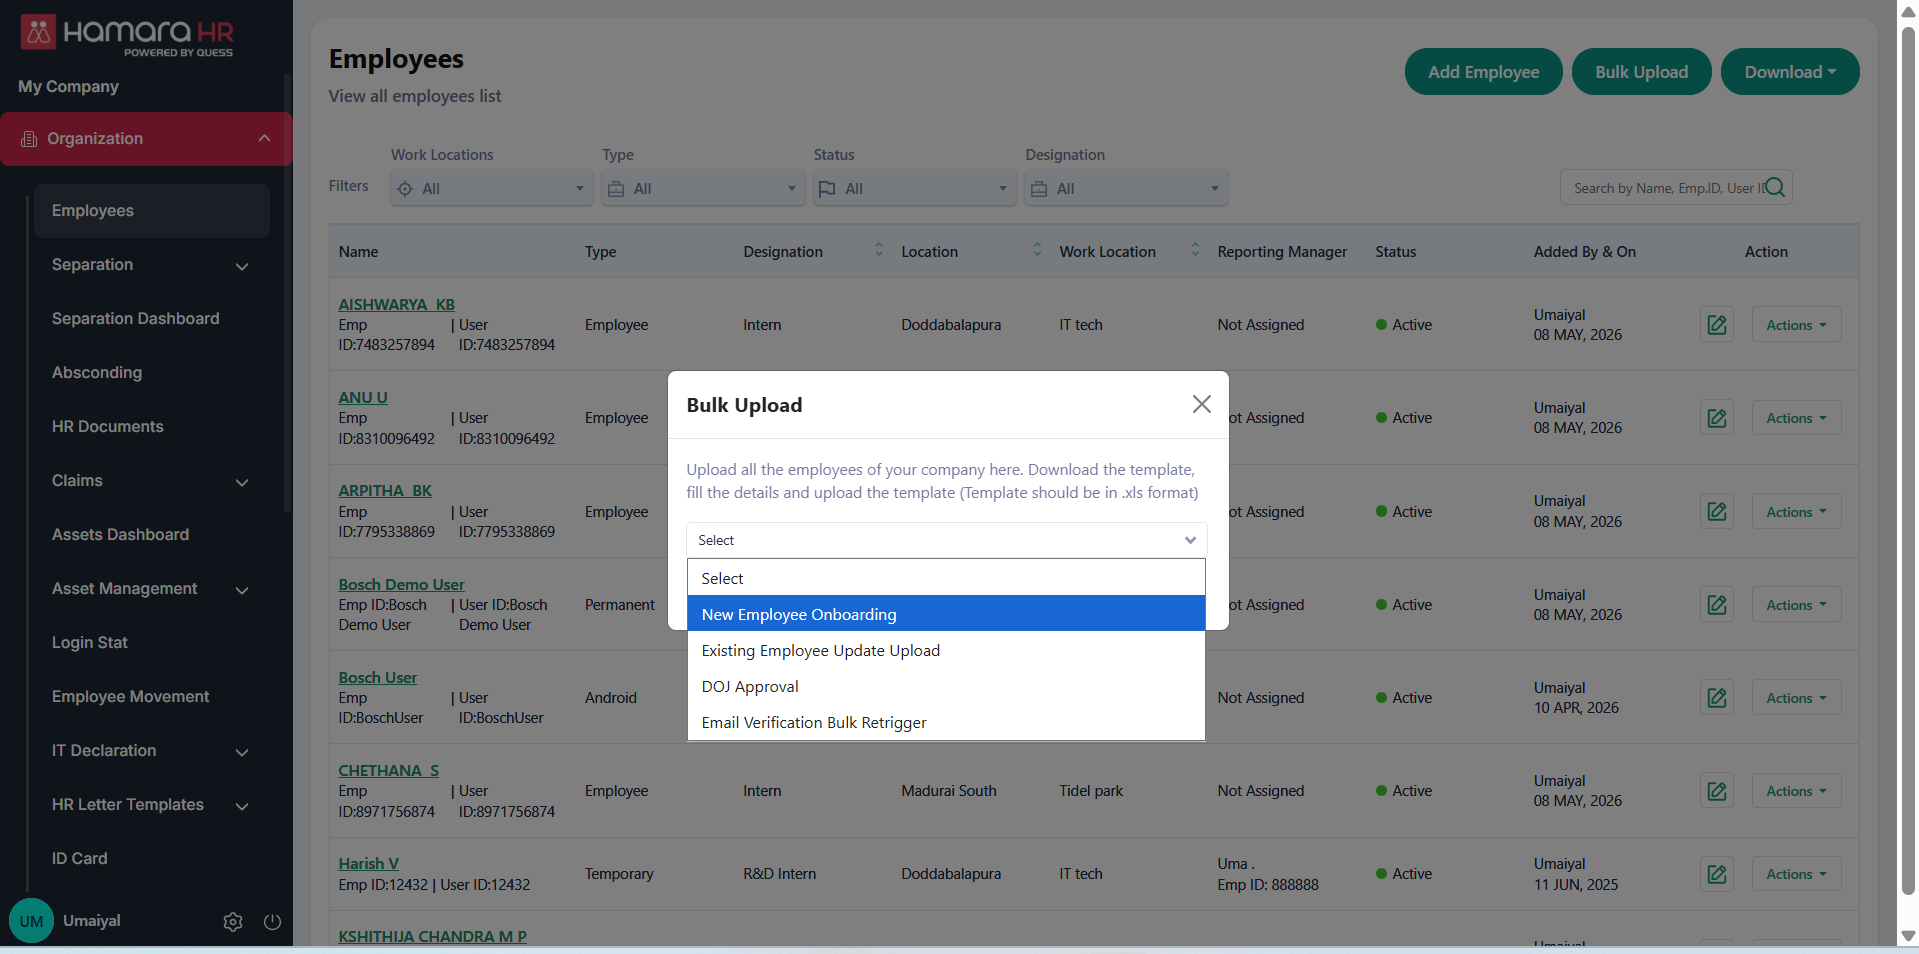
The below template is used to onboard new employees into the Hamara HR portal.

- Navigation Path:
Organization → Employees → Bulk Upload → Existing employee update upload
Used to update the details of existing employees in the Hamara HR portal, such as reporting managers, contact numbers, and role groups.
Note: Before uploading the employee details, ensure that Departments, Designations, Work Locations, Role Groups, and Functional Structures are configured in the Setup section. Use the Reference Sheets available in the bulk upload template to select the appropriate master data.
Ensure that you select the correct template for updating existing employees before uploading the file.
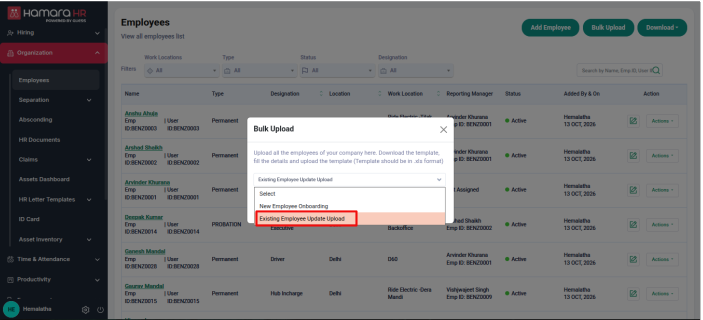
Note: The templates for new employee onboarding and existing employee updates are different. Please ensure you select the correct template before uploading employee details.
You can download the complete master data list, called the Reference Sheet, by following these steps:
Navigation Path:
Organization → Employees → Bulk Upload → Select Upload Type → Dropdown next to Download Template → Reference Sheet
Use the Reference Sheet to verify the master data before uploading employee details.
This is the template for existing employee update upload

Admin can download the employee dump report from the employee list section by clicking the "download report" button and following the navigation path below. The report contains all employee details.
Navigate to: Organization → Employees → Download → Employee report/Existing report

Navigate to: Organization → Employees → Action→ View
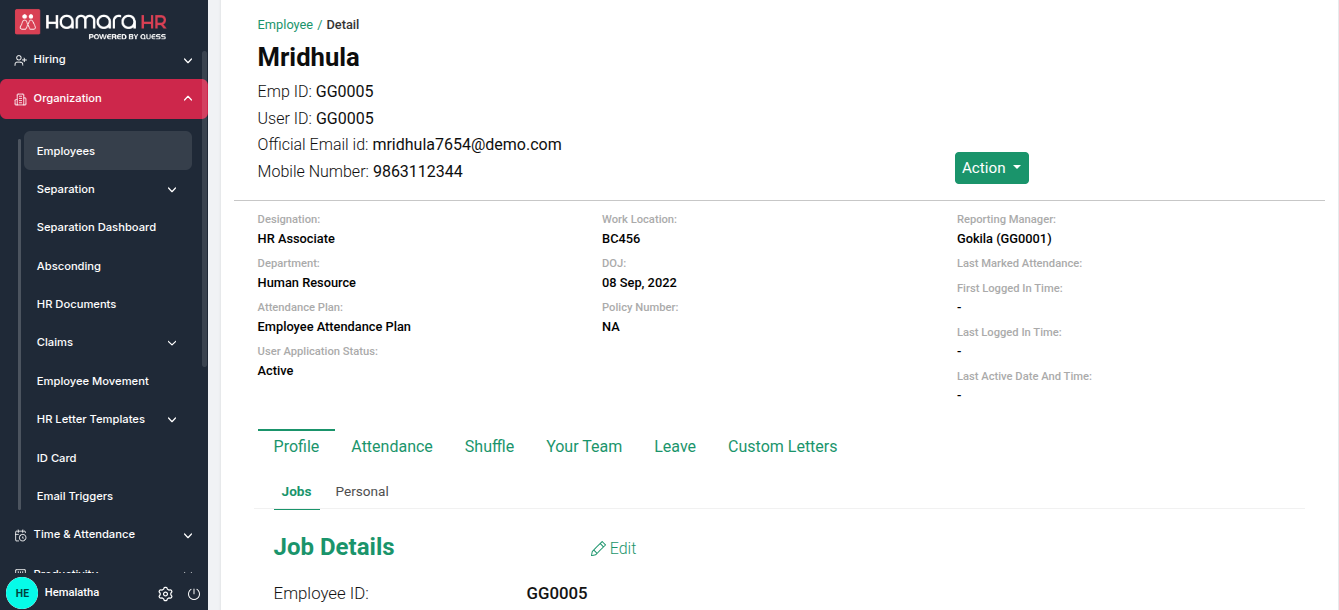
Admin can view the individual employees details by clicking the view button under Actions menu. It'll redirect the admin to new page displaying employee's overall details including job information, personal details, attendance, leave records and other relevant information.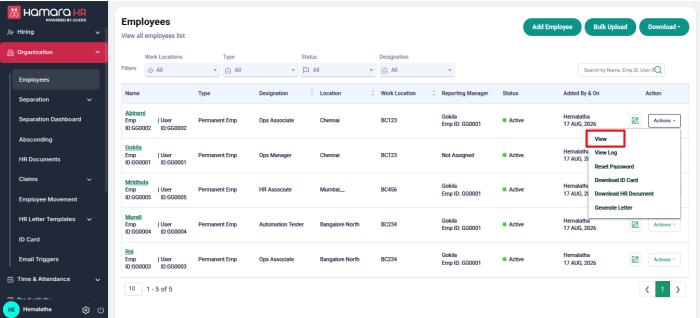
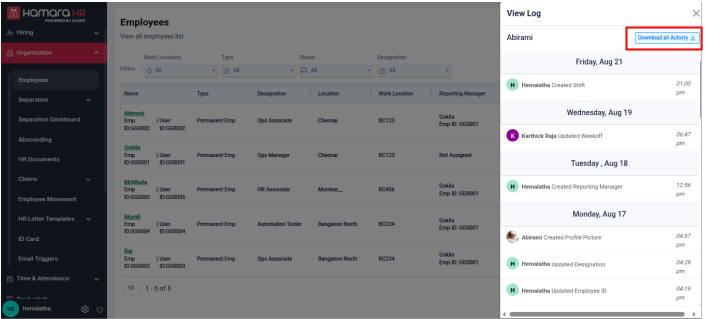
Navigate to: Organization → Employees → Action→ View log → Download all activity
By clicking "View Log", We can see the activity log of the individual employees which records all activities and changes made to the employee's profile from date of creation till date. The activity log can also be downloaded as an excel report for further review verification. 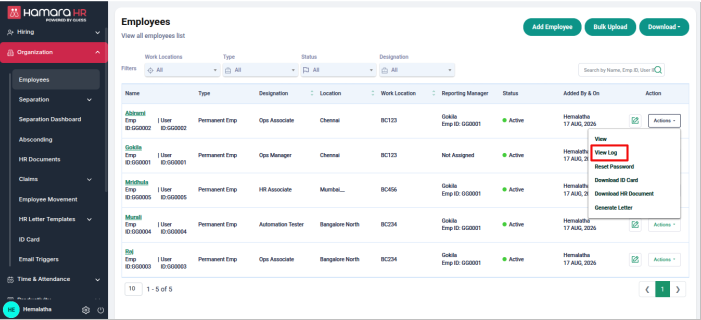
Navigate to: Organization → Employees → Action→ Reset password
Admin can reset the password for a specific employee using the reset password option under Actions menu

Navigate to: Organization → Employees → Action→ Download ID card
Admin can download an individual employee's ID card by clicking Download ID card option. This will redirect to the new page where ID card can be downloaded in PDF format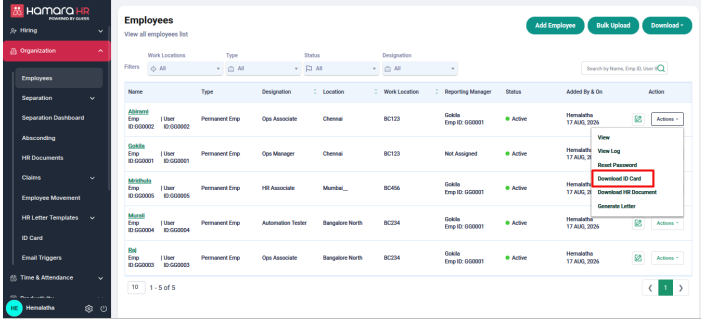
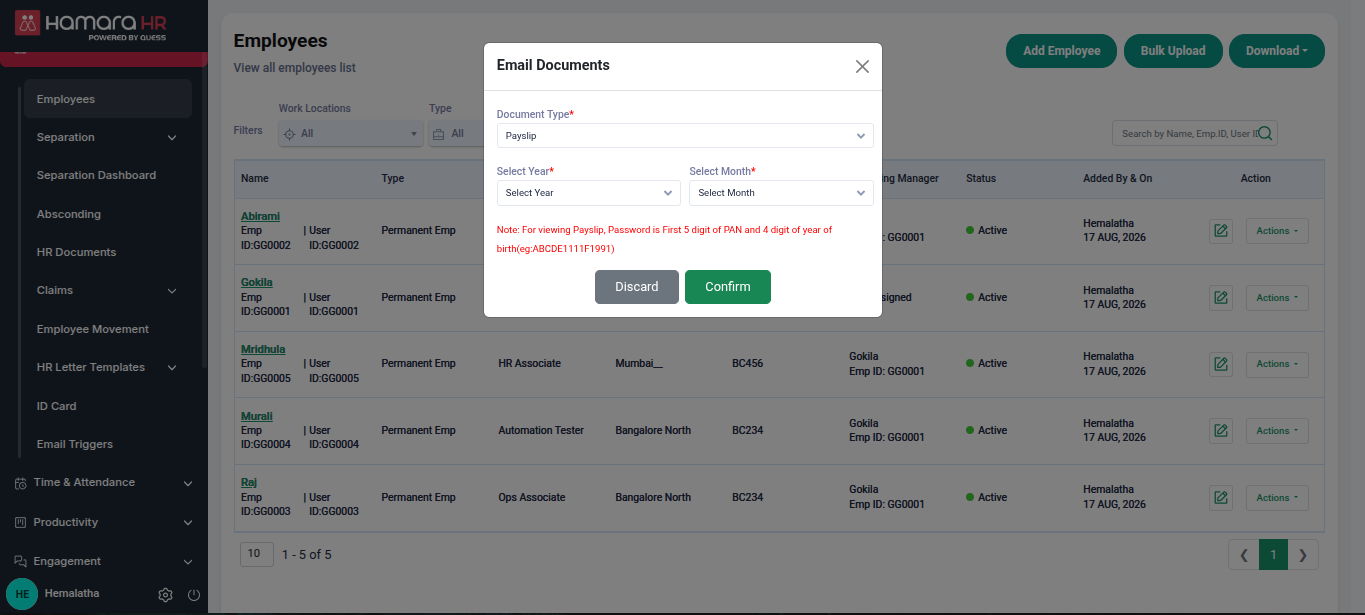
Navigate to: Organization → Employees → Action→ Download HR document
The Admin can download HR document of an individual employee by clicking the download HR document option. A pop-up page will appear, allowing the admin can select and download the required documents for a specific year and month. Available HR documents include offer letter, form 16, IT computation, ESIC card, payslip.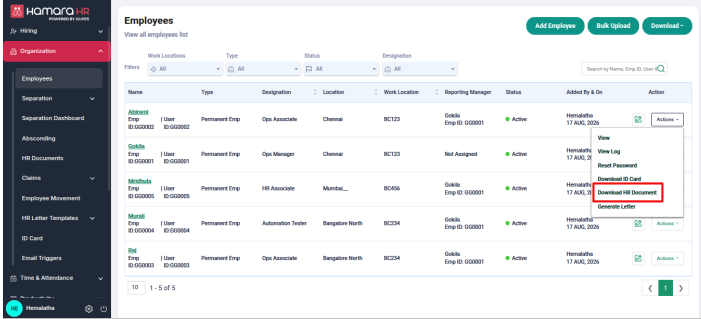
Navigate to: Organization → Employees → Action→ Generate letter
Admin can generate letter by clicking the generate letter option. A pop-up page will appear, allowing the admin can generate the required letter selecting category and template. Available letter categories include employee onboarding, separation, absconding, promotion and warning letter. The admin can choose one of the following options
1. Send Now: Select this option to generate and send the letter immediately
2. Send Later: Select this option to schedule at specified time to generate letter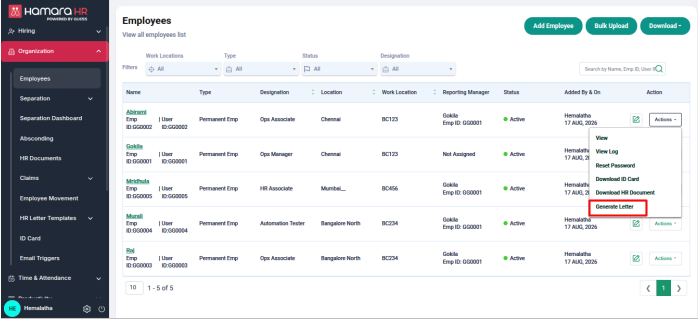
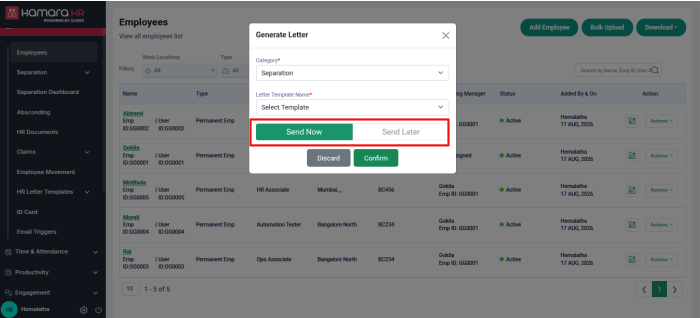
Navigate to: Logs→ Bulk upload
Bulk Upload Logs:
The admin can download logs for all bulk upload including employee creation, designation, attendance exception bulk upload, leave exception upload, shift roaster, work location upload. The bulk upload log screen displays the details of file name, type, update at, update by, queue status, progress in the log screen for each upload.
If queue status is success then We have the below options under action menu
1. View: The admin can view the upload summary for the selected file in a pop-up window. The summary displays the total number of records, along with the counts of uploaded, updated, and failed records.
2. Upload file: Admin can download uploaded file for review.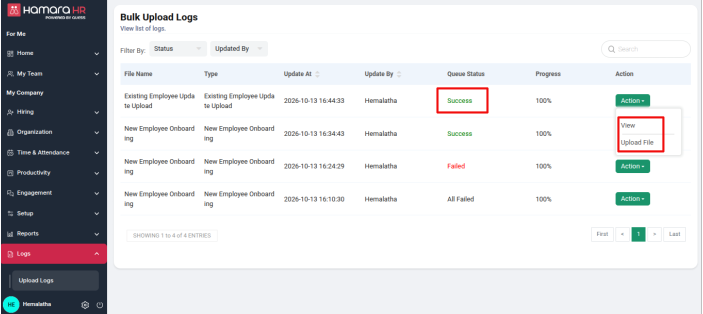
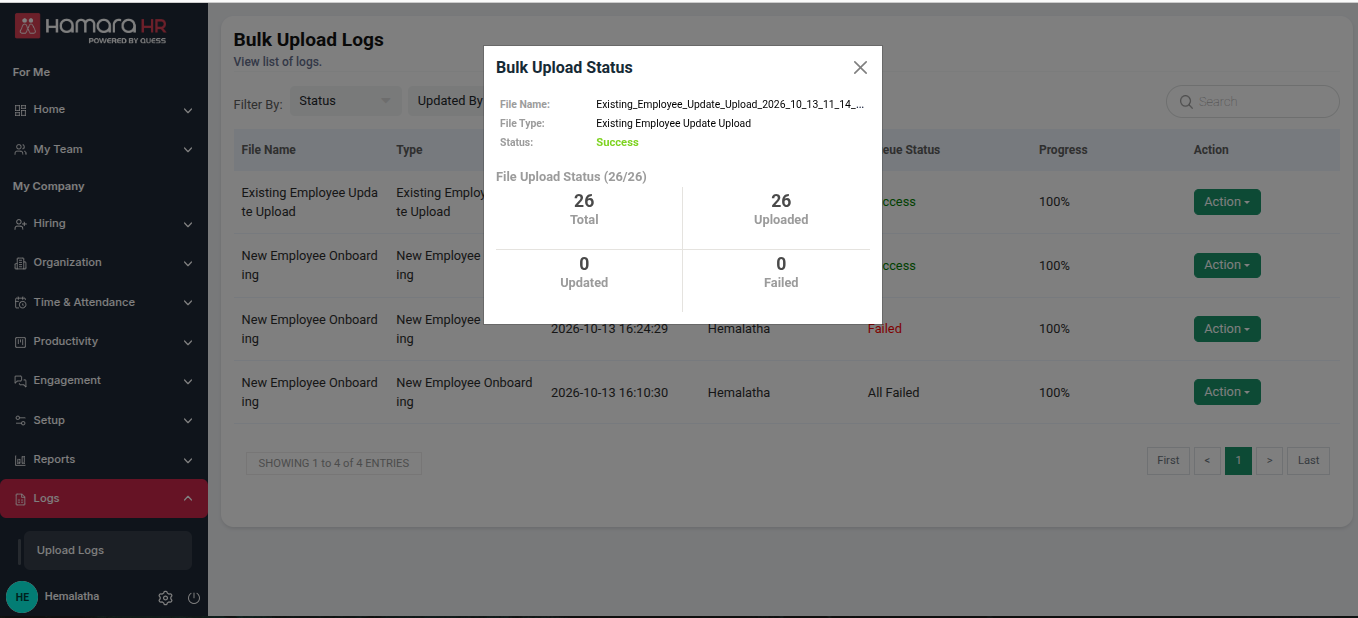
If queue status is failed then we have the below options under action menu
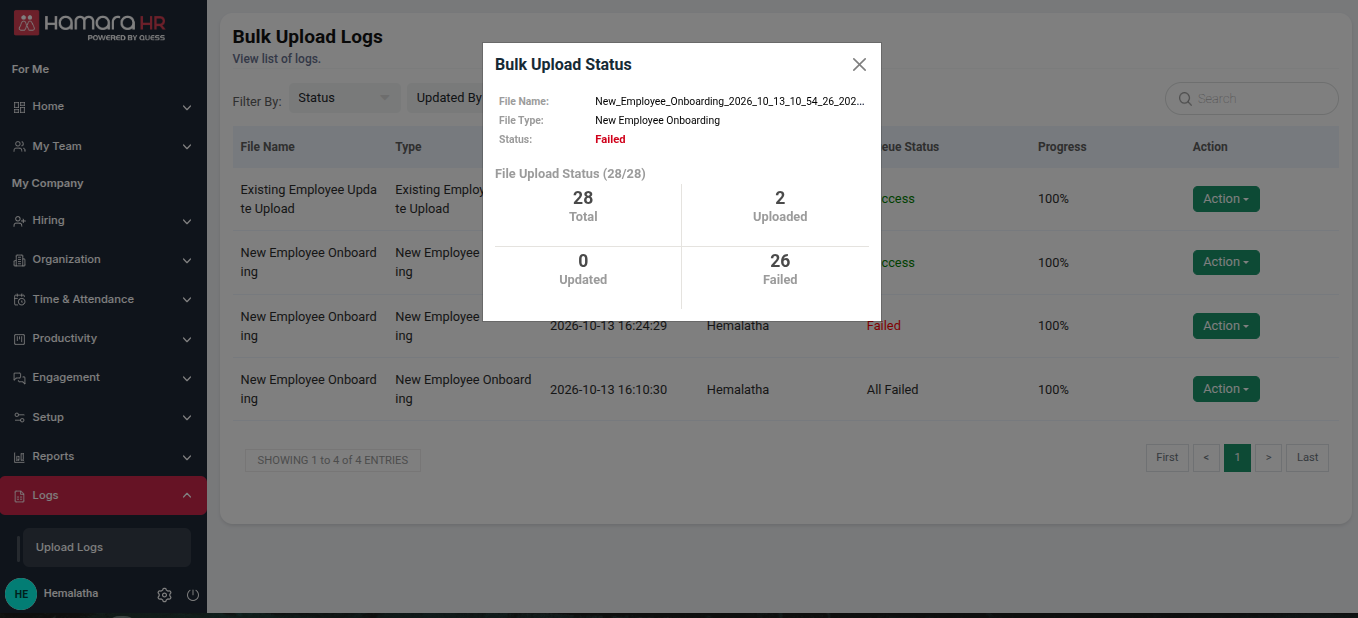
1. View: The admin can view the upload summary for the selected file in a pop-up window. The summary displays the total number of records, along with the counts of uploaded, updated, and failed records.
2. Upload File: Admin can download uploaded file for review.
3. Failure File: The admin can download the failure file, which includes a Comment column containing details of the errors encountered during the upload process.
If Queue Status:
1.Failed: The Failed status indicates that some records were uploaded successfully, while others failed during the upload process. In the pop-up window, the admin can view the number of successfully uploaded records under Uploaded count and the number of failed records under Failed count.
2. All Failed: The All Failed status indicates that all records failed during the upload process. In the pop-up window, the admin can view the total number of failed records under Failed count.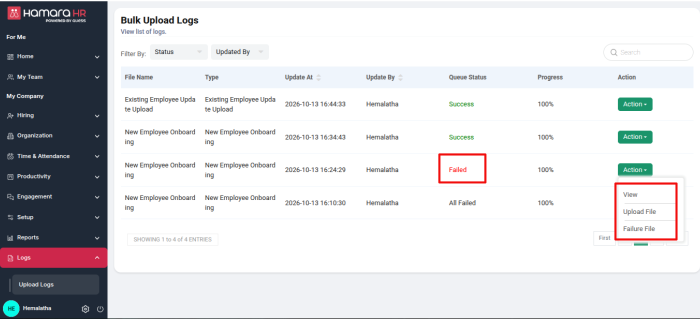

Was this article helpful?
That’s Great!
Thank you for your feedback
Sorry! We couldn't be helpful
Thank you for your feedback
Feedback sent
We appreciate your effort and will try to fix the article